Bulb Planting for Beginners
I’m an amateur home vegetable gardener with only a handful of growing seasons under my belt. I love every opportunity I get to soak up the knowledge of the one and only Bess Trout, Senior Gardener at Lucille’s Garden. She knows so much about so many things! Her memorable metaphors and useful tips always leave me inspired and ready to start a new project.
Recently she helped demystify a topic that I have long wanted to understand better: planting bulbs.
“Bulbs are the ultimate act of hope,” Bess says. “We plant them in the fall when everything else in the garden is coming to an end. It’s like we’re making this promise that spring is going to come again.”
I’m here today to pass along the awesome tips Bess shared on this subject so that you will feel ready to dig in too!
“Just dig a hole and throw a bulb in”
On Oct. 18, I paid Bess a visit at Lucille’s Garden where she was ready to plant two bulb varieties: saffron crocus and garlic.
When I told one of Tyler’s longtime volunteers Louise that I was there to learn about planting bulbs, she put me right at ease when she said very matter-of-factly, “Just dig a hole and throw a bulb in.”
I needed that reassurance that I might be making it out to be more complicated than it really is! Turns out that for planting floral bulbs, it really is that easy. But for planting garlic? There’s a bit more to it.
So I’ll divide Bess’ advice into those two categories. First, the “easy” one.
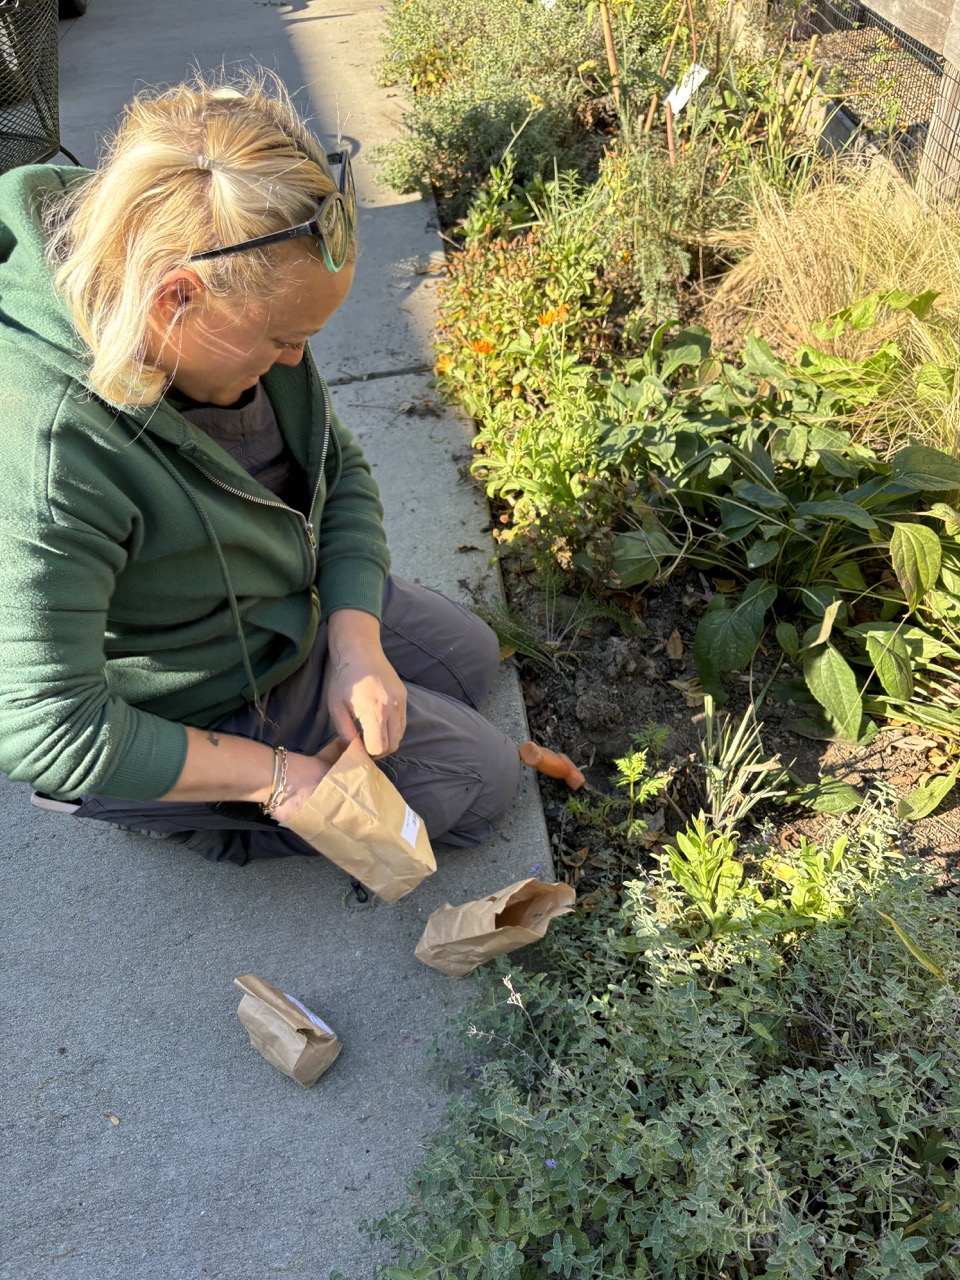
Elisa Ciarrocchi, Assistant Vegetable Gardener, prepares to plant a saffron crocus bulb at Lucille's Garden.
1. Planting Floral Bulbs
Elisa Ciarrocchi, Assistant Vegetable Gardener, was leading the charge on planting the saffron crocus bulbs.
While these bulbs are technically a floral, they are, as their name suggests, the very plants from which saffron threads are harvested. This pricy herb is used to add a delicious flavor and unmistakable color in cooking everything from a Spanish paella to a Pennsylvania German chicken pot pie. Interestingly, you can expect to pay around $24.99 for a package of 15 saffron crocus bulbs, while you might pay $15 per gram of saffron threads. Given that bulbs tend to spread underground year after year, resulting in more and more flowers over time, growing your own saffron crocus could be a pretty sound investment!
As Elisa was counting out saffron crocus bulbs, we noted how they seemed silkier and fancier than your average bulb, as if they knew they contained an extra special ingredient.
Holding one in my hand, I aired one of the things I have found most confusing about planting bulbs: What part of the bulb should go into the hole first?
Here’s when Bess hit me with one of the easy-to-understand metaphors she uses when teaching children who visit the garden.
Her advice: “When looking at a bulb, just ask yourself, ‘Do you stand on your feet or on your head when you get out of bed in the morning?’ “
“Just like us, bulbs want to stand on their feet,” Bess said. “So, we plant them so they are standing on their feet, not their head.”
Take a look at this photo of the saffron bulbs and I think you’ll agree it’s pretty clear what’s the feet and what’s the head when looking at a bulb. In fact, saffron bulbs naturally “stand” on their feet while their “hair” comes out of the top of their heads.
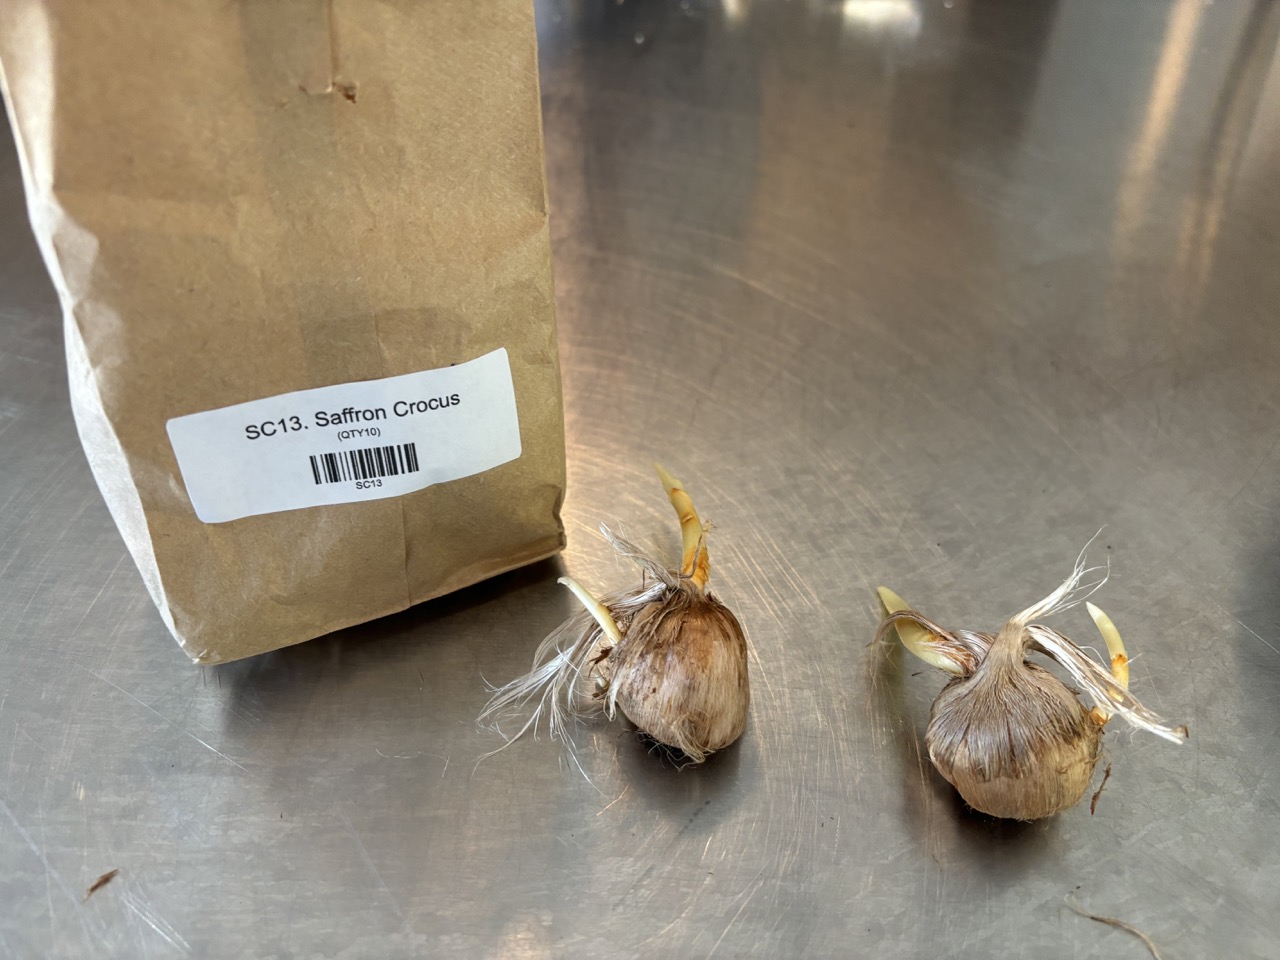
Soon enough Elisa was using her hori knife to dig holes about 4 inches deep where there were some open spaces in the beds outside the vegetable garden fence. These beds are full of beautiful perennial plants that have medicinal and folk uses. Saffron makes a great addition to these plantings because, in addition to its use as a spice, it has been used for more than 4,000 years to treat everything from cancer to mood disorders.
As soon as she hit that 4-inch depth, she popped in one saffron crocus bulb, feet first. Elisa covered it up with the dirt she’d just dug out, and she was done and onto the next one. Watch the video for a quick demo of just how easy it is!
Bess assured me many times: no need to water after you’ve planted a floral bulb. They are dormant at this time of year. You just need to get that bulb into the ground in fall to allow it to go through the literally and figuratively cool process of vernalization: exposure to the prolonged cold of winter that allows the plants to acquire the ability to flower when the weather starts to warm again. For anyone as new to bulbs as I am, this was the info I needed to finally understand just why it is that we plant bulbs in the fall! All bulbs have to spend time underground in the cold of winter to stimulate their growth in spring.
A fun fact about the saffron crocus bulbs Elisa planted that day: they needed to get in the ground this fall so that they’ll bloom not in Spring 2025 but in Fall 2025! I will be eagerly visiting Lucille’s next Fall to watch for the arrival of our saffron crocus!
The method Elisa and Bess used to plant the saffron crocus bulbs is the same with all floral bulbs:
- Dig a hole to the appropriate depth for your bulb type (read the package the bulbs come in or do a quick Google search).
- Pop the bulb in “feet” first.
- Cover it back up with the dirt, and voila! You’re done. (Though do read the tips in the “Protecting Your Bulbs” info box if you have deer and squirrels who are likely to forage for your freshly planted treasures.)
In terms of spacing them out, read up on your bulb type for the appropriate distance. Keep in mind that bulbs will tend to spread themselves year over year.
And what if you forgot where you planted your bulbs and accidentally dig them up in the process of planting something else? Just pat them back in place and apologize for disturbing them.
2. Planting Garlic Bulbs
Bess explained that garlic is one of those things that requires a bit more work during the planting phase before you can leave it alone to do its thing underground.
She particularly loves growing garlic, however, because it will actually start sprouting in the fall before the cold of winter. Seeing its happy green shoots coming up when everything else is asleep is a welcome reminder that another year of vegetable gardening is never too far away!
“I love ending my growing season by beginning my next one,” Bess told me as we gathered compost from Tyler’s reserves in preparation for planting the garlic bulbs.
Because of its ability to tolerate the cold, Bess likes to get garlic into the ground in the middle of October, hopefully before the first frost. Another fun expression Bess shares with the children who visit Lucille’s Garden drives this point home, “Why do we plant garlic before Halloween? To keep the vampires away!”
The garlic bulbs arrived as full heads of garlic, so Elisa assisted by breaking the heads of garlic into individual bulbs.
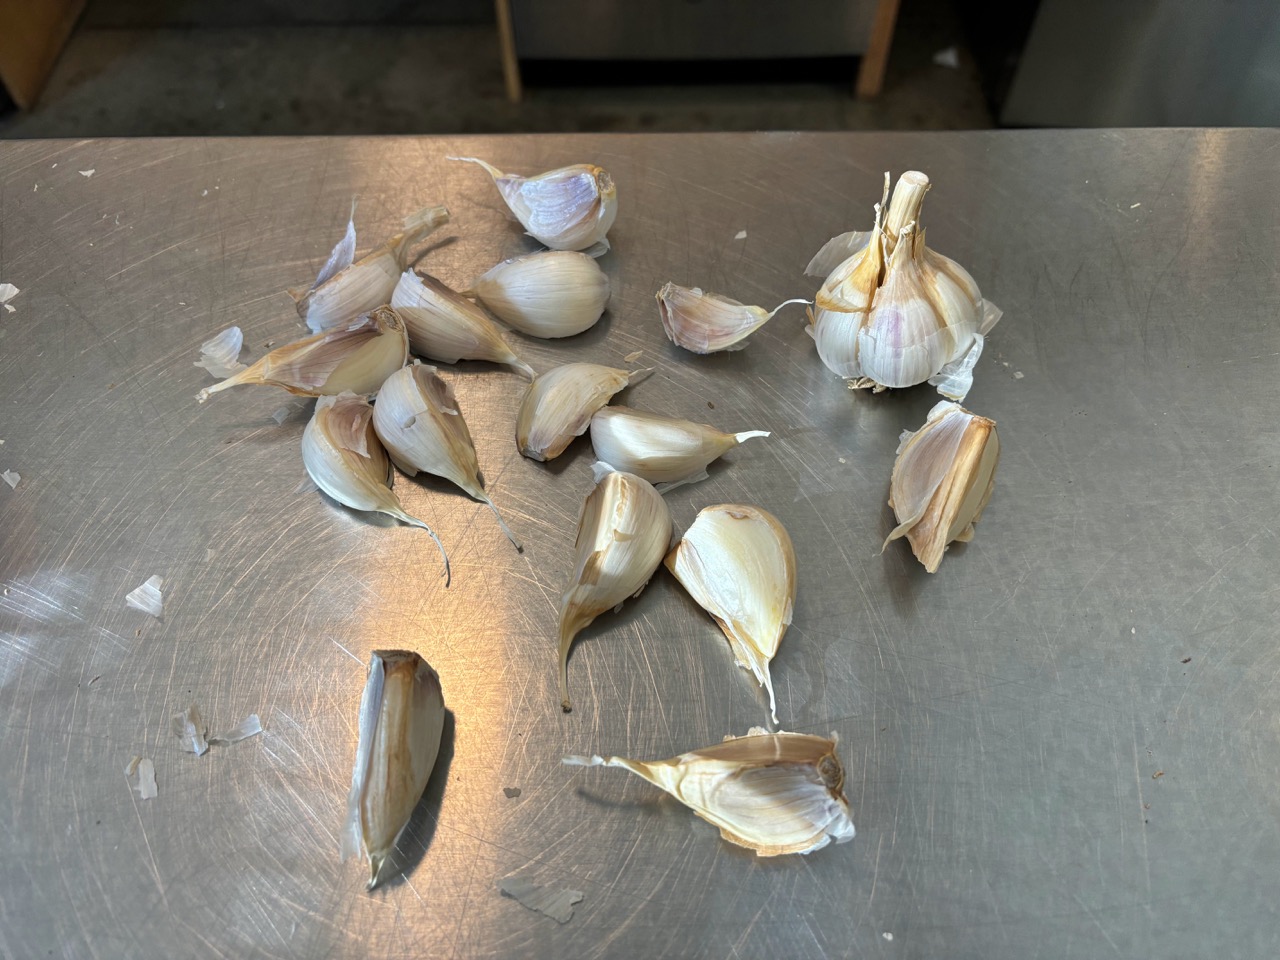
Before and after: A garlic head (top right corner) and the individual bulbs that result after breaking other heads apart.
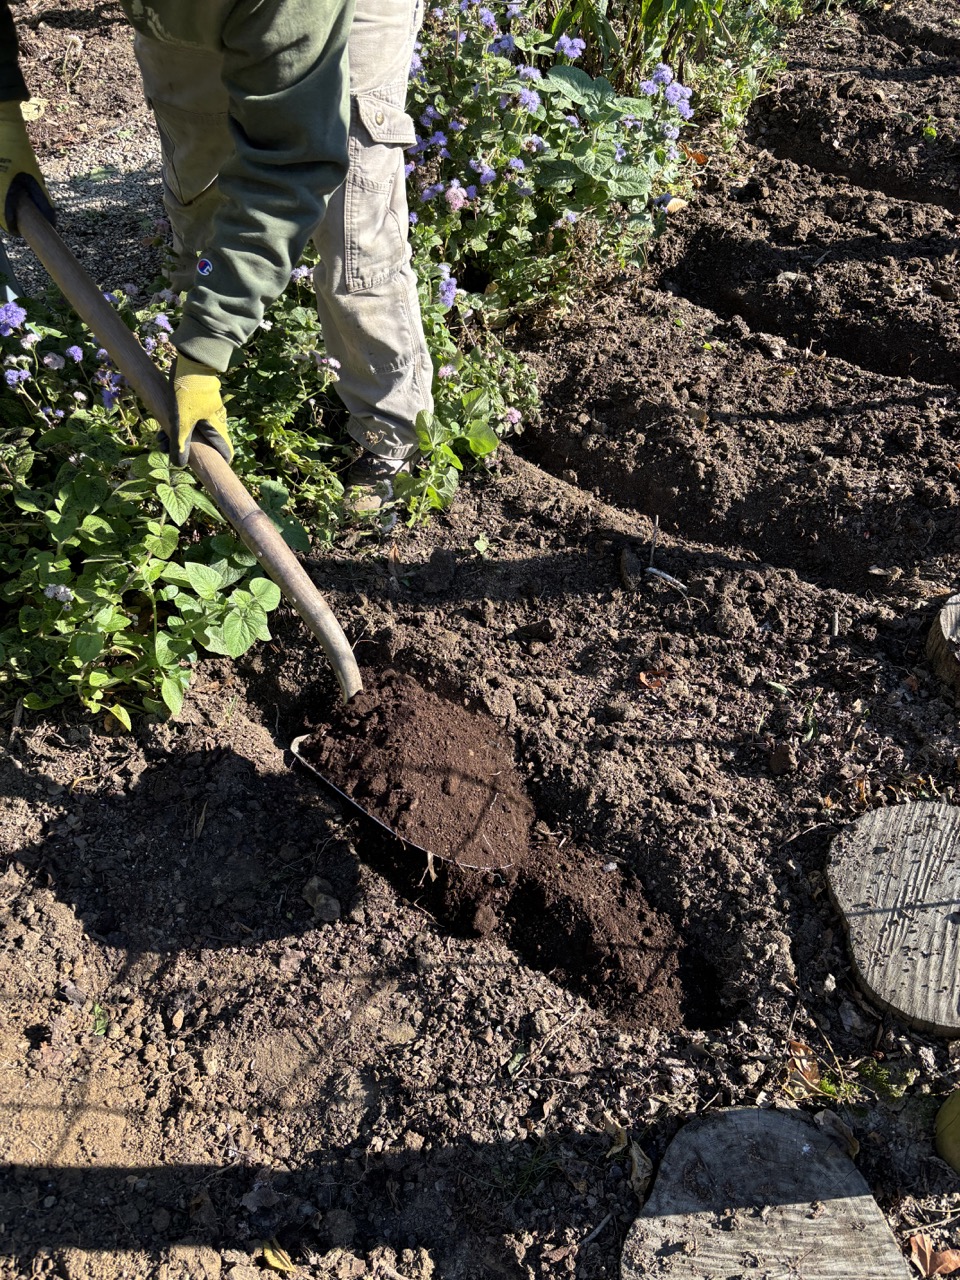
Bess adding a layer of fresh compost on top of a trench.
To prep the ground for the garlic, Bess used a method called “double digging.” First, Bess and Elisa dug trenches spaced about a foot apart. Then, Bess added a layer of compost on top of each trench and carefully mixed the existing soil with the compost, breaking up any large chunks so that the bulbs would be in loose soil free of any barriers to growth. The end result was a mound of dirt.
“Mounding allows for growth to happen earlier — the soil warms more quickly with the sun hitting it from more directions,” Bess explained.
Bess also planted garlic bulbs in a raised bed the week before. The raised bed also creates a warmer environment and so no mounding is needed there. Adding compost as a top layer to the soil of your raised bed is good for the bulbs too!
Bess pointed out that while she doesn’t find it necessary to add compost to floral bulbs, she always uses it for garlic so that it has access to as much nutrition as possible to maximize its growth.
Whether you plant your garlic bulbs in a raised bed or in mounds, Bess said, you’ve got to remember: “Garlic is a loner. It likes its space and is a bit more standoffish than your average bulb.”
That meant we planted it at least 6-8 inches apart. For the mounds, we got 3 bulbs in per row. Once again, we used a hori knife to dig to a depth of at least 4 inches, popped the bulb in, covered it back up with the loosened dirt, and that was that. Watch the video for a look at Elisa’s technique!
Unlike the floral bulbs, Bess watered the garlic bulbs immediately after planting since they will start their growth right away. Then, the final step was to cover them with straw to provide some insulation.
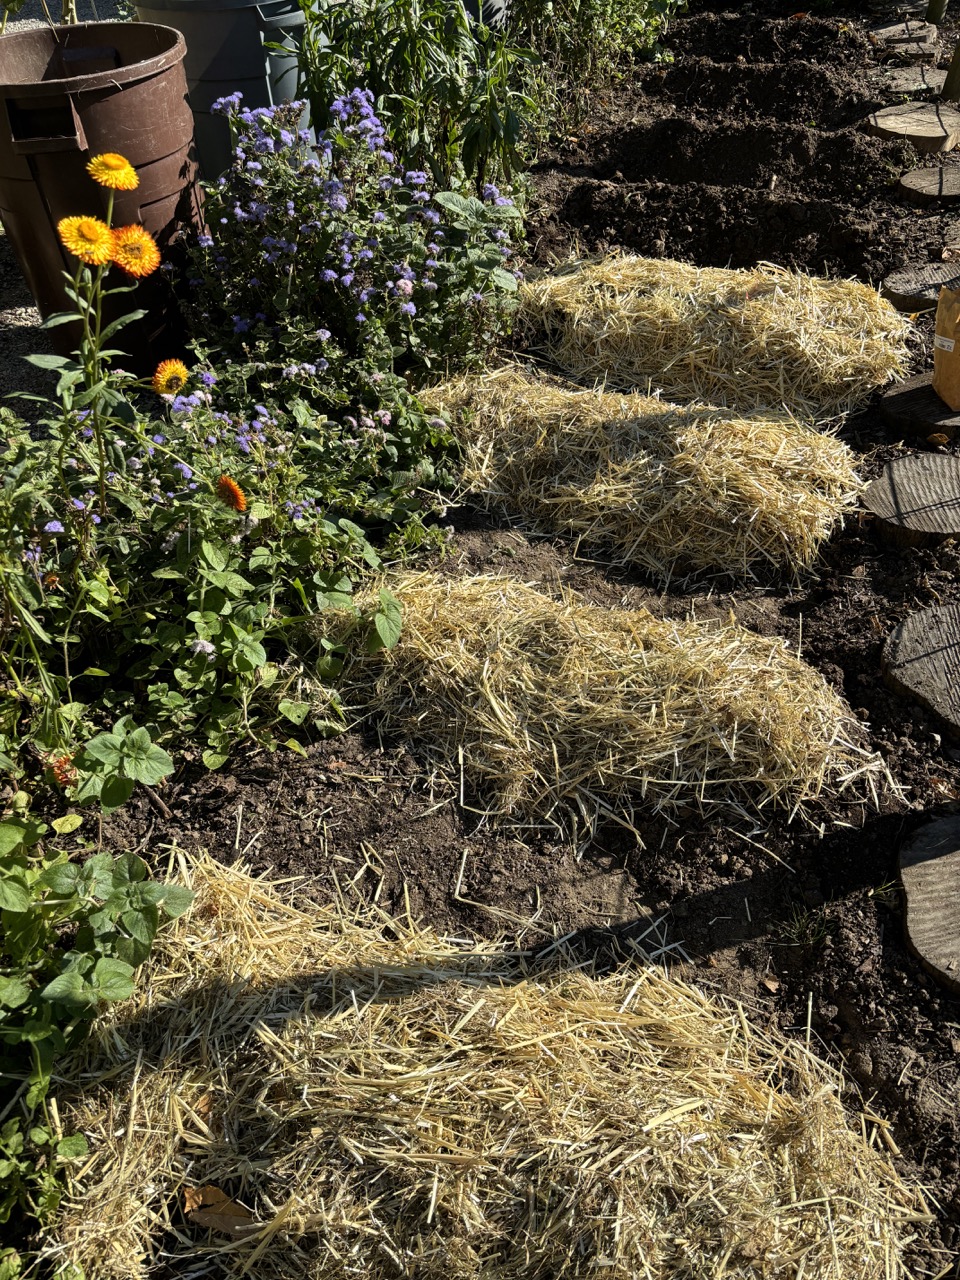
The first 4 mounds are all finished: 3 bulbs of garlic dug to a depth of 4-6 inches and spaced about 6-8 inches apart, watered and topped with a layer of straw.
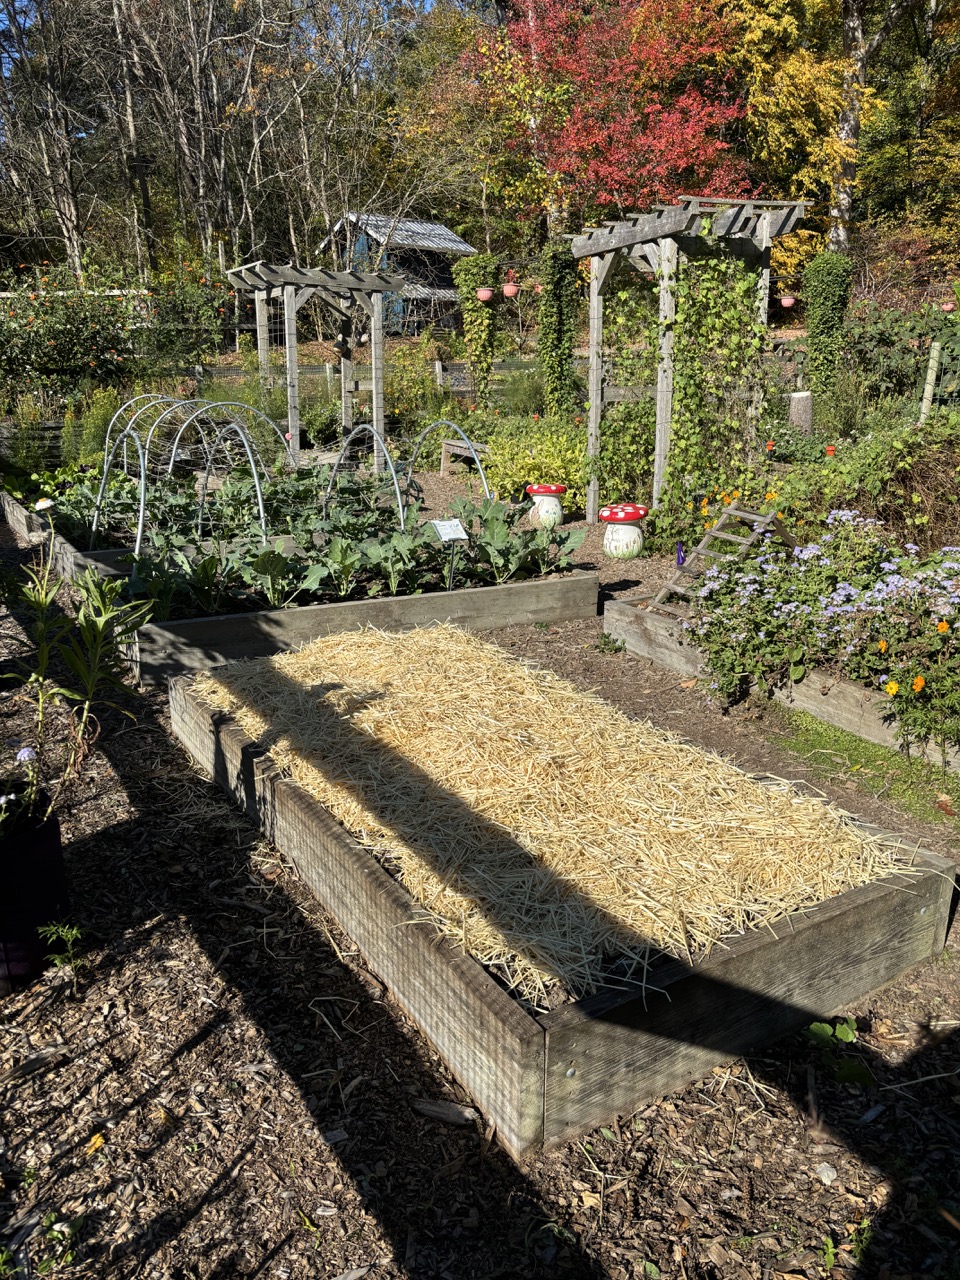
A view of the raised bed planted with garlic bulbs earlier in October. Keep an eye out for signs of early growth still to come this fall!
After all that prep, the garlic bulbs are on their own to grow until they are ready for harvest in July. And that space you see in between the mounds? Bess and Elisa will plant pepper plants there in May. Just when the garlic will be ready to come out of the ground, the peppers will be ready to really take off and take the space over. A stellar example of well-planned companion planting!
I left my morning with Bess, Elisa and Louise ready to sew the promise of spring by planting bulbs in my garden this fall. I’m so excited to look for their growth in late February and early March, when they are taking in the sun’s warmth well before any leaves appear on the trees.
Be sure to stop at Lucille’s Garden to check on the progress of the garlic, saffron crocus and more!
If you have any questions you’d like to ask Bess, please email info@tylerarboretum.org.
Protecting Your Bulbs
Protecting Your Bulbs
If you live somewhere where deer, squirrels and other critters are likely to go after your bulbs for their dinner, Bess advised the following:
- Place chicken wire on top of the area where you plant bulbs until the soil is frozen.
- Consider purchasing and applying coyote urine around the perimeter of the area you planted to scare critters away. (NOTE: It’s possible that over time, however, the critters will wise up to this trick.)
There are some bulb varieties that animals don’t enjoy. The pungent aroma of garlic bulbs makes them unappetizing. Daffodil bulbs are poisonous so they have a built-in defense.
Crocuses will get eaten, however, so watch out if you plant your own saffron crocus!
When in doubt, do a bit of research on the bulb varieties you’re planting.
Where to Buy Bulbs
Where to Buy Bulbs
Lucille’s Garden sources its bulbs from:
A Book for Inspiration
A Book for Inspiration
“Planting a Rainbow” by Lois Ehlert: Read this with the children in your life to share the beauty of bulb planting with them!


