It’s freezing and canning time! As a matter of fact, I am freezing herbs from my garden as I write this, and I currently have water ready on my stove for canning green beans and cucumbers right after I’m finished writing this blog.
This year needs to be a time when I not only give my garden’s abundance to others, but given my food bills lately, I need to save more from my garden to lower my food bills during the late fall, winter, and early spring. In addition, I am aware of how food waste increases greenhouse gasses which contributes to climate change, and I want to do my part to help slow down rising temperatures. My, has it been hot this summer!
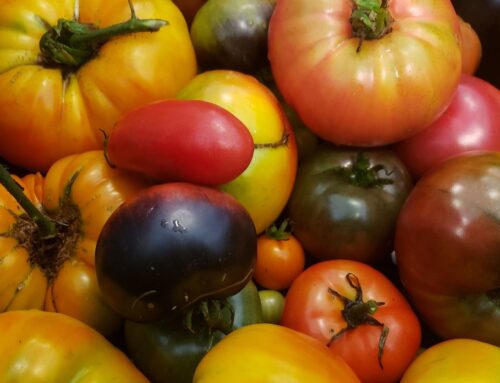
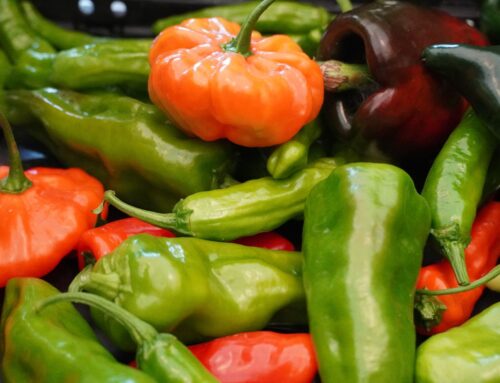
Some of us have gardens, and some of us like to go to farmer’s markets, orchards, or roadside produce stands. If you have an abundance in your garden or buy in bulk, freezing and canning are for you. Freezing and canning food as a means of preservation gives us the freedom to access vegetables, fruits, and herbs when we need them.
*The following is intended as an overview of the freezing and canning process. As always, consult with the manual for any equipment you are using to determine the correct process for your tools. Another great resource is the National Center For Home Food Preservation.
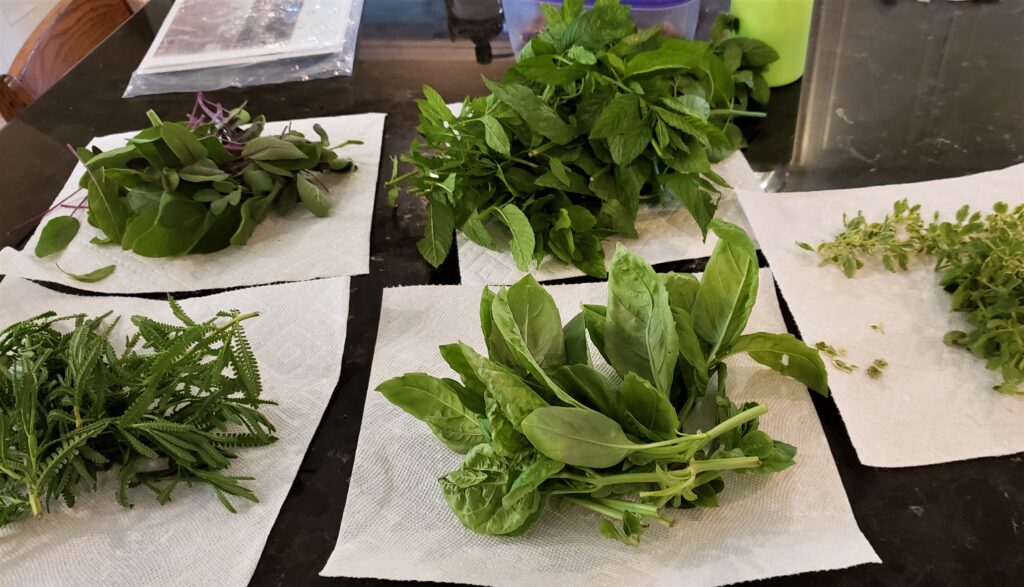
Preparing fresh herbs to freeze
FREEZING:
- Wash your produce before freezing. Use produce at peak flavor and texture for freezing. Whenever possible, harvest in the cool part of the morning and freeze within a few hours. Soak in cold water for two minutes.
- Cut up your produce. Cut away any inedible or undesirable areas. Remove the peel, stem and any pit or inedible seeds. Avoid freezing the fruit or vegetable whole because it is tough to chop when frozen.
- Blanch your vegetables. Blanching time is crucial and varies with the vegetable and its size. Under–blanching stimulates the activity of enzymes and is worse than avoiding blanching altogether. Use one gallon of water per pound of prepared vegetables. Put the vegetables in a blanching basket and lower them into vigorously boiling water. Place a lid on the blancher and start counting blanching time as soon as the water returns to a boil. Beware – this process over-blanching causes loss of flavor, color, vitamins, and minerals. Most vegetables can be blanched in boiling water. Both steaming and boiling are satisfactory methods for broccoli, pumpkin, sweet potatoes, and winter squash. To steam, use a pot with a tight lid and a basket that holds the food at least three inches above the bottom of the pot. Put an inch or two of water in the pot and bring the water to a boil. Put the vegetables in the pot in a single layer so steam reaches all parts equally. Cover the pot and keep the heat. Begin counting steaming time starts as soon as the lid is on. Steam blanch for the time recommended by each vegetable. Blanching also softens vegetables making them easier to pack. Directly after blanching, submerge in an ice bath or continually running cold water (60 degrees F or lower) to stop them from cooking. Cooling vegetables can take the same amount of time as blanching them. You can find the blanching times for many popular vegetables here! Microwave blanching is not recommended due to enzymes not being activated, off-flavor, texture,, and color loss. Plus, microwave blanching has not been shown to save time or energy.
- Cool and dry your vegetables.. When cooked, drain vegetables, and pat dry.
- Freeze. Once your produce is dry, lay them on a cookie sheet with parchment paper, and place this in the freezer overnight. The next morning pack them in freezer bags or vacuum-sealed bags. If you are a plastic-free household, use glass Tupperware to freeze your produce or a glass canning jar (wide mouth works best). Some household containers are not recommended for freezing. The cardboard cartons that milk, ice cream, or cottage cheese come in are not moisture-vapor resistant enough. Regular jars (not canning jars) break too easily at freezer temperatures. I like to freeze liquid items (for example, spaghetti sauce) in a silicone mold (i.e., Souper Cubes) and herbs in ice cube trays.
- Label and Store. Label packages with the name of the product and the freezing date. Freeze at once at 0 degrees F or lower. Freezing speed is important for the best quality. For the quickest freezing, place the packages against the refrigerated surface of the freezer. After the vegetables are frozen, rearrange the packages and store them close together. Most vegetables maintain high quality for 8-12 months. You may want to post a list of frozen vegetables on the freezer and check off packages as they are used.
Note: There is no need to defrost frozen food beforehand. Frozen fruit can be used in smoothies and baked goods. Frozen vegetables can be steamed or used in soups, casseroles, pasta dishes, or any other cooked recipe.
Vegetables with a high liquid content such as cucumbers, cabbage, radishes, mushrooms, and lettuce are not recommended for freezing. They will become soggy and mushy.
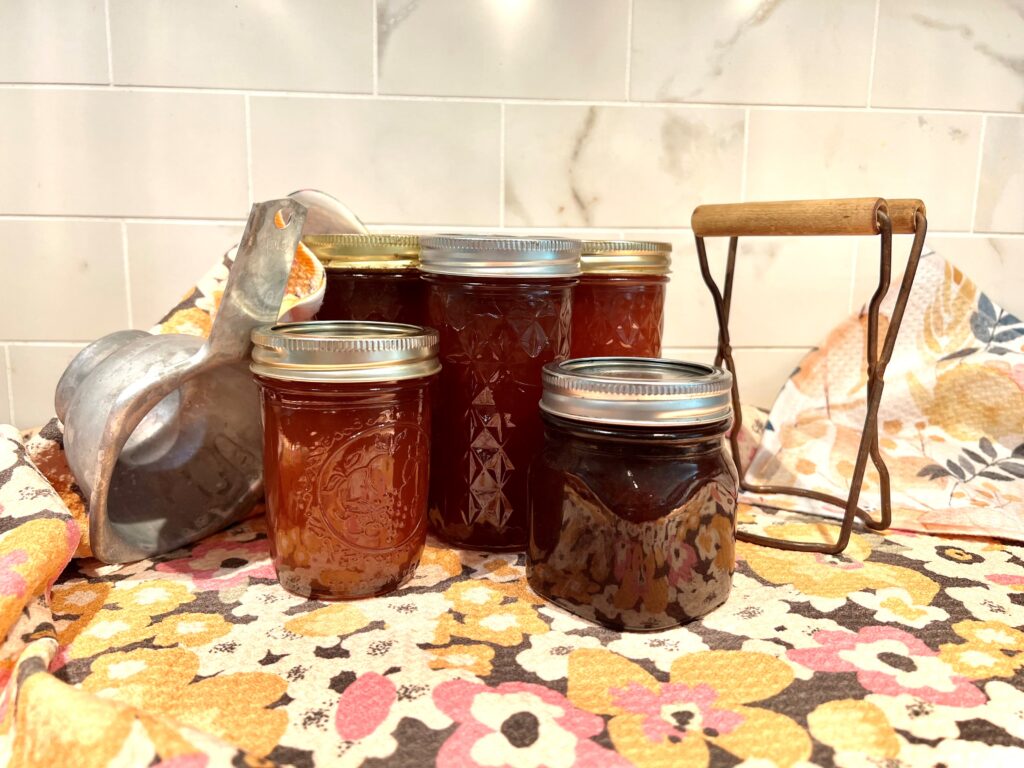
Canning supplies
CANNING: Canning is a method of food preservation in which food is processed and sealed in an airtight container. Canning provides a shelf life that typically ranges from one to five years.
The canning process involves placing food in jars and heating them to a temperature that destroys microorganisms that could be a health hazard or cause the food to spoil. Air is driven from the jar during heating, and a vacuum seal is formed as it cools.
There are two safe ways of canning, depending on the type of food being canned. These are the boiling water bath method and the pressure canner method.
Wash all canning jars in soapy hot water, rinse well, and keep hot in boiling water, which prevents the jar from breaking when processed in the canner. Be sure to use new two-piece lids. Follow the manufacturer’s instructions for treating the lids and the rims.
Boiling Water Bath Method: The water bath method is safe for high-acid foods such as fruits, tomatoes, and pickles, as well as jams, jellies, and other preserves. In this method, jars of food are heated by being completely covered with boiling water (212 degrees F at sea level). To can tomatoes and figs using the water bath method, an acid in the form of lemon juice or citric acid must be added.
- Fill your jars, allowing enough headspace – typically between ¼ of an inch and 1½ inch, depending on what you’re canning. Remove air bubbles using a rubber spatula around the inside of the jar, gently sifting the food so that any trapped air is released. Add more liquid, if necessary. Don’t forget to leave adequate headspace.
- Wipe off the rims of the jars with a clean, damp cloth. Without touching the inside of the lids, screw them on but not too tightly – air needs to escape during the processing.
- Put filled jars on the rack in the canner. Add more boiling water (from a teapot you had boiling) or take out some as needed so that the water is at least one inch over the tops of the jar. Put the lid on the canner and set the heat to its highest setting.
- When the water in the canner reaches a rolling boil, begin counting the correct processing time. Then adjust the heat to maintain a gentle and steady boil, add more boiling water as necessary.
- When the jars have been processed in boiling water for the recommended time, turn off the heat and remove the canner lid. Wait five minutes before removing jars.
- Use a jar lifter to remove the jars carefully. Place the hot jars right side up on a cooling rack or dry towel to prevent them from breaking on contact with a cold surface.
- Allow jars to cool untouched for 12-24 hours. Do not tighten the ring bands on the lids, and do not push down on the center of the flat metal lids until the jars are completely cooled.
Pressure Canning Method: Pressure canning is the only safe method of canning low-acid foods (those with a PH of more than 4.6). These include all vegetables not being pickled.
- Put two to three inches of water in the pressure canner. It should be hot but not boiling when canning raw packed food; hot or gently boiling for hot-packed foods. Make sure you still have two to three inches of water when you are ready to load the canner.
- Fill the jars, leave adequate headspace, remove air bubbles with a rubber spatula, wipe jar rims, and put on the lid.
- Set jars in a rack canner so steam can flow around each jar. Fasten the canner lids so that no steam begins to escape except through the vent. Let the steam escape steadily for 10 minutes.
- Close the vent using a weight, valve, or screw. If you have a weighted-gauge canner that has a weight of varying pressures, be sure you are using the correct pressure.
- For a dial-gauge-canner, let the pressure rise quickly to eight pounds of pressure. Adjust the burner to let the pressure continue to rise to the correct pressure. Start counting the processing time as soon as the pressure is reached. For a weighted-gauge canner, bring the canner to a high heat at first and then adjust the heat down slightly until the weight begins to rock gently or “jiggles” two to three times per minute, depending on the type of canner you have. Start counting the process as soon as the weight does either of these.
- Adjust the heat under the canner to maintain a steady pressure at or slightly above the correct gauge pressure. If the pressure goes too high, turn down the heat under the canner. Do not lower the pressure by opening the vent or lifting the weight. This could result in under-processing or unsafe food.
- When the processing is completed, carefully remove the canner from the heat. If the canner is too heavy, turn it off.
- Let the pressure in the canner drop to zero. It will take about 30-45 minutes. Do not rush the process by running cold water over the pressure canner, lifting the weight, or opening the vent. Forced cooling may result in food spoiling.
- Use a canner lifter to remove the jars from the canner carefully. Place the hot jars on a cooling rack or dry towels, right side up, to prevent the jars from breaking on a cold surface. Leave at least one inch of space between the jars. Don’t tighten the lids. Allow the jars to cool, untouched for 12-24 hours. Remove screw bands from the sealed jars to prevent them from rusting on. Wash, dry, and store screw bands for later use. Wash food residue from the outside of the jars and rinse. Label contents and canning date. Store in a clean, cool, dark place. The best temperature is 50 -70 degrees F.
Note: A bulging lid or a leaking jar signifies of spoilage. When opening the jar, look for mold and an off-odor. Spoiled canned food should be discarded and not eaten by humans or pets.
Canning can feel overwhelming – especially if you don’t have someone on hand to teach you in person! As always, we suggest you carefully follow directions and know your resources before undertaking any food project. The National Center for Home Food Preservation has a great list of FAQs and how-tos to answer your specific questions.
Congratulations! You have made it to the end of this long article.
I admit a list of instructions isn’t as enjoyable as a well-told story. Yet, I believe you will say it was worth it when you crave fresh, colorful, and nicely textured frozen or canned food after your garden harvest, the farmer’s market, or roadside stand is no longer there, around November. I hope you will join me in the feast that will come from our frozen and canned reserves until we begin to harvest again in spring.