The holiday season is upon us, and no matter what traditions you keep, this is a time to spread joy, practice gratitude, and create some beauty. So, as we move through December and January and do such things for our human community, let’s make sure we leave some space to do the same for our wildlife neighbors. Below you’ll find written instructions and how-to videos to help you create birdseed (and bird food!) ornaments to decorate your very own backyard Thankfulness Tree.
So gather together with your friends and family, virtually or in person, to create some unique ornaments for the wildlife to enjoy. We guarantee that watching the squirrels scurrying past with mouthfuls of peanuts and birds perching delicately on an orange cup feeder will bring joy to the winter months. You’ll be giving them the gift of essential food as temperatures drop, and you’ll get the pleasure of watching them feast!
Follow the instructions below to create your Thankfulness Tree. And take photos! We would love to see them.
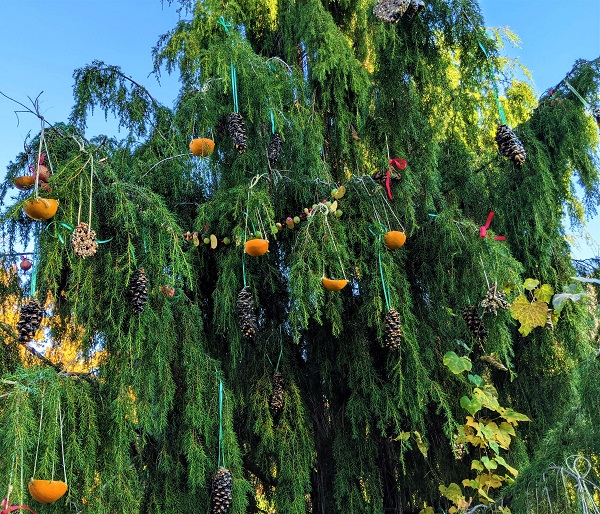
Thankfulness Tree at Tyler, Winter 2020
Orange Cups (Each orange will hold ½ cup of seed or less)
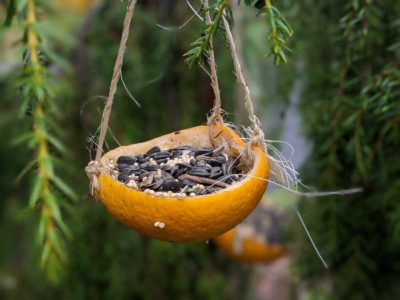
Orange cup feeder
Supplies
Sturdy unblemished oranges cut in half from the navel. Remove orange flesh with a spoon.Jute or Sisal, cut to 20” in length, you will need 3
Skewer
Sewing needle made for accommodating yarn (most craft stores will carry this in the yarn section)
Small cup to place seeds
Birdseed of your choice
Instructions
Skewer the orange cups in three spots, ensuring they are even.
Thread jute/sisal through the needle and pull through the hole created. Tie jute to the cup and collect tops.
Hang cups up before filling.
Peanut Butter Cones
Supplies
Cones of all shapes and sizes. The cones must be open and have gaps to place the peanut butter in.
Butter knife
Ribbon or jute (about 6”)
Creamy peanut butter
Bird seeds of your choice. We used black oil sunflower seed..
Instructions
Start with tying the ribbon or jute to the cone by wrapping it under the cone scales.
Smooth peanut butter under the scales as well as over.
Roll in seed and apply pressure so the seeds will stick.
Fruit Garlands
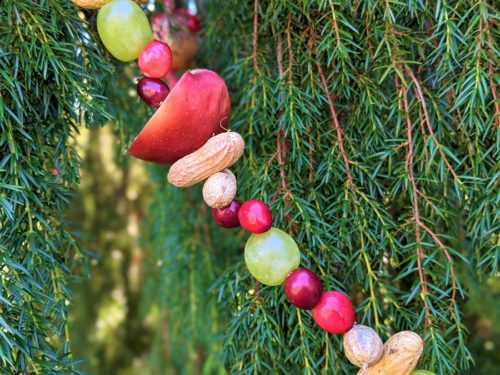
Fruit garland
Supplies
Any combination of:
- Fresh cranberries
- Green grapes
- Apples – Cut up into 6 to 8 segments
- Peanuts in shells for feeding birds
Dental Floss (2′ to 6′, depending on the tree and your patience)
Several cut up branches and twigs that are finger thickness
A sewing needle for yarn
Instructions
Cut approximately 2′-6′ of floss. Tie one end to a branch and thread the other through the needle. The twig should be able to take the weight of your garland and stop the fruit from pulling through. Start stacking the fruit and tie it off with another twig.
Seed Ornaments
Supplies
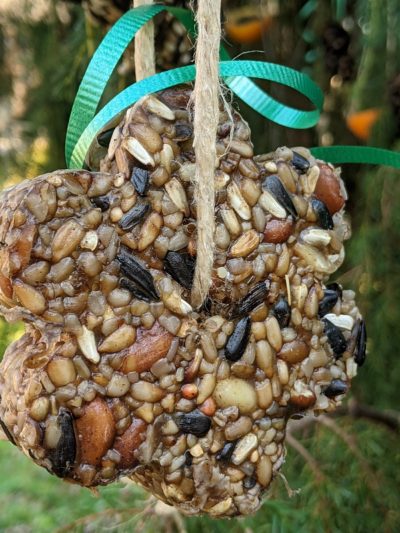
Seed ornament
2 cups of birdseed (any kind)
2 packets of powdered plain gelatin
½ cup of hot water
Spatula, mixing bowl, whisk (not pictured), and measuring cup.
Pan spray (not pictured)
CCookie cutters (I found plain cookie cutters worked better than ones with intricate shapes) and/or mini cupcake pan or mini cake pan.
Parchment paper placed on a cookie sheet (not pictured)
Paper Straws cut to 2” tall
Bamboo skewer that would fit through the straws
Jute or ribbon *
*I recommend that the length of the jute should be 3x the length of the ornament, and then multiply by 2. For example, 1” ornament should be tied with a 6” jute.
Instructions
Place all cutters on parchment paper/cookie pan. Spray all cutters/pans with pan spray.
Place gelatin and hot water in the bowl and whisk until all gelatin has melted.
Pour 2 cups of birdseed into the bowl, and with the spatula, coat the seeds with the gelatin.
While it is still warm, quickly place the seeds into the cookie-cutters (which is on top of parchment) or cake pan.
Press firmly as you go.
Once the cutters/pan are filled, insert straw to the center and press firmly around.
Place in the freezer for one hour.
Place another piece of parchment on the counter.
Remove the seeds ornaments from the cutter/pan by tapping them on the counter. They should slide out easily from theonto parchment. Distribute evenly so the ornaments can thaw.
Wait for the seed ornaments to warm up. Insert the bamboo skewer into the straw to clear the hole.
Thread jute or ribbon through.
Place the ornaments on a tray in a cool room to set further.
Suet Ball Ornaments
Supplies
Suet
Rubber bands
Ribbon (optional!)
Netting material (can be recycled orange holders, coarse grain burlap, recycled stockings with tears…whatever you have on hand!)
A wire hook to use as a hanger
Instructions
Using your hands, shape the suet into a fist-sized ball..
Place the suet ball into the netting..
Use the rubber bands to close both ends of the netting material..
Use the ribbon to decorate the top or bottom of the suet ball..
Attach the hanger to the netting and hang!